Chain of Command game 11th Armoured Division vs 9th SS-Panzer Division 'Hohenstaufen'
I finally got to have a second game of Chain of Command. I like Bolt Action for its fast, easy and fun system but I am seriously liking Chain of Command for its more historical and tactical approach. Its starting Platoon system backed up by the force support options, give lots of different approaches to dealing with the various scenarios available.
If you had read my report from my first game you will know that we had played a Platoon Patrol meeting and unfortunately the Germans had managed to send my brave ol' Tommies packing.
This game was Attack and Defend scenario with my lads from the 2nd Platoon, C Coy, 4th KSLI yet again up against the dastardly 9th SS Panzer Grenadiers.
So onto the game.
After his humiliating defeat at the hands of Hauptman Von Slie of the 9th SS, Lt Tommykins has made plans to attack the walled farmstead just outside Le Valtru. The German's have occupied this area since forcing the British to withdraw a few weeks ago. New Intelligence has been received by the KSLI that the Germans are without heavy support and don't appear to be ready for an assault. Plans have been drawn up for Lt Tommykins to advance on a wider frontage against the farm hoping to flank and surprise the SS defenders.

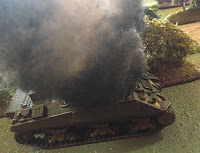
 Taking the first phase I immediately deployed Lt Tommykins and a 2" Light Mortar Team. In the last game I never managed to deploy the mortar and it would make a significant difference this time. Deploying a small scout team on the right flank who would try and winkle out any hidden German defenders in the opposite hedgerows Tommykins could still see the wrecked hulk of the Sherman lost in the last fight around the farm.
 Von Slie observing the advancing British kept his forces under cover, not willing to show his hand so early. Although he did send a section of Panzer Grenadiers to his flank to counter the scouts. A brief firefight broke out and the British scouts were cut down leaving their deployment point seriously exposed.
 Lt Tommykins ordered his light mortar to fire and with its first high explosive shell it managed to kill a lone Grenadier. It then continued to lay down a blanket of smoke shells across the front of the farm to screen the advancing British Troops.
 This smoke screen hampered the now deploying SS Grenadiers and seriously limited their use of over-watch and covering fire allowing the KSLI sections to deploy in the fields on the left and right. Von Slie seeing more and more British infantry advance in the fields in front of him screamed orders for his recon section to advance to contact - mounted in a Sd.Kfz. 250, they dashed around the buildings straight towards the cornfield looking to open up with their mounted MG42's.
However the Tommies were ready and LCpl Rex Splode dived out of his concealed position in the hedgerow and fired his PIAT. The shot was literally bang on target, hitting the halftrack and destroying it in a large fireball decimating the recon team inside.
 The British were gaining the upper hand and pressed the attack. The Panzer Grenadiers were hemmed back unable to aim in on the British due to the smoke screen laid down. The only opening for the Germans was on the right where the scouts had been gunned down and the Germans dashed a section down the hedgerow trying to limit the British advance.


 Cpl Lenow opened up with his section, dropping a few of the Grenadiers but the discipline of the SS troops overcame the shock of the amount of fire they were taking and held them in place. Although with the fast deployment of a Bren Gun section and its weight of fire they were soon forced to hit the dirt. Casualties on this SS unit were low but they were pinned in place and all the Senior and Junior leaders could do was hold their troops and keep them motivated.
Lt Tommykins observing the SS section pinned under the withering fire now screamed "Now Maitland it's your time". Cpl Maitland and his section, being hidden in the trees now burst from cover and decimated the pinned SS troops. when the smoke had cleared only the Feldwebel and Obergefreiter were left standing and they turned and ran towards their own lines.

Maitland urged his lads forward and it wasn't long before both German Commanders were cut down close to the hedgerows. Leaving Maitland close to flanking the whole German force on the right.


 At the same time as the German right flank was collapsing Sgt Jones had sent a lone Bren Gun Carrier on a fast dash to counter the SS left flank. Unfortunately when it tried to cross the low hedges it threw a track and as it ground to a slow crawl an SS Panzerschrek gained a good line of sight on it and the resulting shot saw the Carrier and crew blown to smithereens.
However this seemed like the last throw of the German dice and with the KSLI advancing on all sides the Grenadiers retreated further and further into the grounds of the farm before finally after taking more devastating fire from all sections and the remaining Carriers, Von Slie retreating with a resounding Raus Schnell!!
This was a brilliant game, not so much as I had won it, but because I had managed to get to grips with the ordering and deployment of my British Force. Having the early positioning of the light mortar really helped with limiting the German MG fire on my sections which enable me to manoeuvre more easily. Also using a Chain of Command Dice to ambush the Half track with my PIAT and the best result I could manage, knocking the whole thing out it one go caused the Germans force morale to drop quickly.
Looking forward to the next game, not sure if we will continue the adventures of Lt Tommykins (although I think he needs promoting to Capt now) or we look at playing through one of the available campaign systems. Either way it should be a blast.